


How To Build Wheelchair Ramps: A Step-By-Step Guide
Introduction
Accessibility isn’t just for convenience. It's a fundamental human right, and a wheelchair ramp serves as a vital bridge, ensuring that anyone with mobility challenges can access spaces and opportunities. And when it comes to needing a wheelchair ramp, you’re going to have the option to purchase a ramp for your requirement, or you may be a DIY enthusiast and decide to build one of your own!
Building a wheelchair ramp, whether it may be a smaller threshold ramp or a longer ramp overcoming multiple steps, understandably can seem like a daunting task for even the handiest of individuals. From the novice to the experienced handyman, this is your guide to set you on the right path to not just building a wheelchair ramp, but to building a more accessible, equitable environment for your loved ones.
With the right guidance, building a ramp becomes a manageable project that can make a world of difference. In our guide, we'll walk you through the step-by-step process of planning and building a functional wheelchair ramp. Let's dive into the nuts and bolts of constructing a wheelchair ramp that ticks all the boxes.
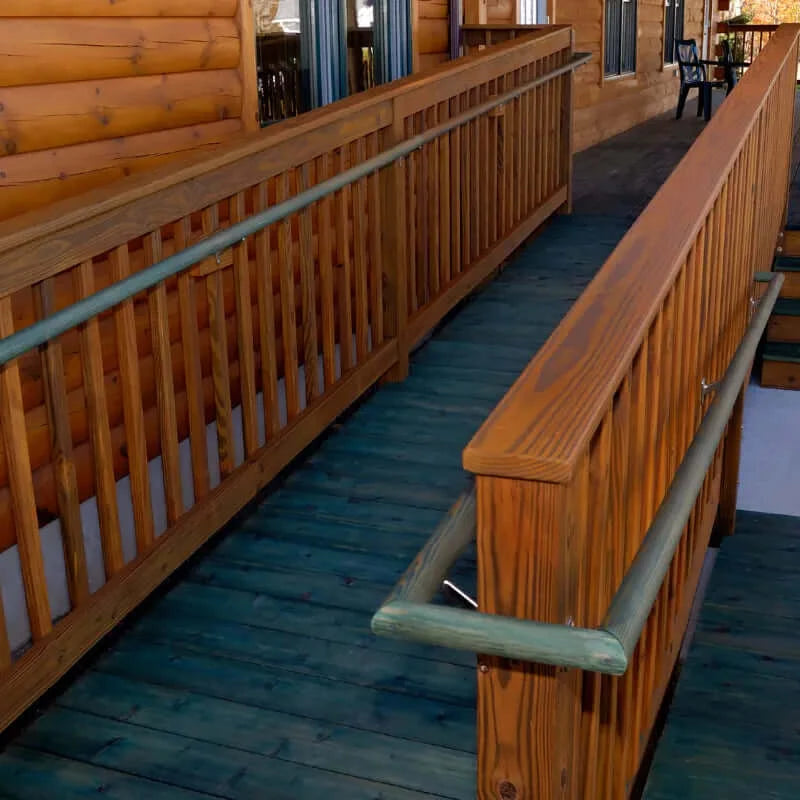
Table of Contents
Click below to Jump to any of the topics covered in this blog!
Planning for your Wheelchair Ramp
Step By Step Construction
Part 1: Planning for your Wheelchair Ramp
Planning your wheelchair ramp is a pivotal step in achieving true accessibility. If you’re building this ramp for you residence, then planning for the correct slope, length, materials, and safety features is paramount. This guide will primarily focus on larger ramps (overcoming 10”+ thresholds), but you can use the same though processes when planning for smaller threshold ramps if your requirement is only a few inches!
Understanding the local regulations, permit requirements and codes is vital to ensuring a functional and secure ramp. By thoughtfully planning for your wheelchair ramp, you can have a clear idea of what you need to build for your specific requirement.
Understanding Wheelchair Ramps - Materials
Wooden Wheelchair Ramps
Wooden Ramps are going to be a user-friendly choice making it the most common material used for homemade ramps. Common tools like hand saws or circular saws for cutting lumber and drills for attaching screws are sufficient when building the ramp. To ensure sturdiness for heavy electric wheelchairs, be sure to use 2 in. x 6 in. lumber for the framework, anchored to 4 in. x 4 in. posts set in concrete footings below the frost line.
For the ramp's surface, employ 5/4 in. x 6 in. deck boards secured with exterior deck screws, and make sure to use treated lumber for enhanced durability against weather and wear.
Prioritize screws over nails during construction for long-lasting stability and safety. Nails are suitable only for joist hangers.
Benefits of Wooden Wheelchair Ramps:
- Cost Effective & DIY Friendly
- Customizability
- Aesthetically Pleasing
Disadvantages of Wooden Wheelchair Ramps:
- Durability & Maintenance
- Slippery Surface
- Relatively limited weight capacity

Cement Wheelchair Ramps
Constructing a wheelchair ramp out of cement offers several advantages. Cement ramps are exceptionally durable and weather-resistant, capable of withstanding various climatic conditions without significant wear and tear. Their solid structure ensures a high weight-bearing capacity, making them suitable for heavy electric wheelchairs and equipment. Additionally, cement ramps require minimal maintenance, reducing long-term upkeep costs. While the initial installation may be more labor-intensive than some alternatives, the longevity and reliability of cement ramps make them a dependable choice for long-term accessibility solutions. Building a ramp out of cement will present more obstacles than a wooden ramp will but, as previously mentioned, it will last longer and be more sustainability than other materials.
Benefits of Cement Wheelchair Ramps:
- Durability & Longevity
- Stability & Safety
- Low Maintenance
Disadvantages of Cement Wheelchair Ramps:
- Cost & Labor Intensive Installation
- Lack of Aesthetics
- Permanent Fixture

Aluminum Wheelchair Ramps
Building your wheelchair ramps out of aluminum is a smart choice for accessibility infrastructure. Aluminum is known for its remarkable combination of strength and lightness, making it an ideal material for ramp construction. The setbacks to building your own aluminum wheelchair ramp is going to be finding the correct material and being able to manipulate it, and have the tools to manipulate it, into the ramp that you desire. These ramps are resistant to corrosion, ensuring they maintain their structural integrity even when exposed to the elements. The use of aluminum ensures longevity and requires minimal maintenance.
Benefits of Aluminum Wheelchair Ramps:
- Durability & Longevity
- Lightweight
- Low Mainteance
Disadvantages of Aluminum Wheelchair Ramps:
- Cost & Labor Intensive Installation
- Lack of Aesthetics
- Temperature Sensitivity

Understanding Wheelchair Ramps - Cost
Planning for the cost of a wheelchair ramp is essential. It’s important to know what to expect before you get too far into the project, and learn that it may have been a better decision to go anothe route. It ensures that you have the necessary funds for materials, labor, permits, and safety features. Neglecting this aspect can lead to budget constraints and compromises in quality and safety.
So, budgeting upfront is vital for a smooth and compliant construction process. This cost is going to be easier to calculate if you intend on building a smaller, portable ramp where your cost is only going to be for the materials. A larger, modular like ramp that will need to overcome a larger threshold will be more complicated when budgeting.

Planning & Preparation - ADA Guidelines
To ensure that your wheelchair ramp meets safety and accessibility standards, it's helpful to refer to the guidelines provided by the Americans with Disabilities Act (ADA). While the ADA primarily outlines standards for public areas, you can use these recommendations as valuable guidance when constructing a ramp for your home.

Planning & Preparation - Plan Your Location
Selecting the optimal location for your ramp involves considering various factors. These factors include the accessibility of the doorway from different parts of your home, the doorway's width, and whether existing elements like stairs, platforms, or porches can readily accommodate a ramp.
To ensure a smooth planning process, it's advisable to create a plan that includes details like your property lines, home size, and ramp dimensions. This plan should specify the ramp's height, length, width, and its distance from the sidewalk or street, especially if a building permit might be necessary. While not mandatory in all areas, having such a plan can be immensely helpful for your own planning and record-keeping. In some cases, securing a permit might require a plan drafted by a professional engineer or carpenter, so it's essential to consult your local building code office for specific documentation requirements.
Planning & Preparation - Calculating The Slope
Start by measuring the distance between the ground and the threshold to determine the ramp's rise. Remember, a single ramp run should not exceed a 30-inch rise. If the threshold height surpasses 30 inches, you'll need two or more ramp sections separated by level landings.
Slope, defined as the ratio of vertical rise to horizontal length, is critical. ADA guidelines permit a 1:12 slope, meaning one inch of rise for every 12 inches of length. A gentler 1:16 slope is easier for manual wheelchairs, while a 1:20 slope requires less effort but increases length and material requirements.
To determine the horizontal projection of the ramp from the threshold, multiply the rise by the desired slope (12, 16 or 20 from the example above) and divide the result by 12 to convert to feet. For instance, a 30-inch rise multiplied by a 1:16 slope equals 480 inches, which divided by 12 equals 40 feet - the ramp's horizontal extension from the threshold.
If your yard lacks space for this length in one straight run, incorporate turns and landings between multiple ramp sections.

Planning & Preparation - Designing The Wheelchair Ramp
When building your own wheelchair ramp, it's essential to consider several key factors for safety and accessibility:
- Ramp Width: Ensure a minimum width of 36 inches between handrails.
- Handrail Continuity: Ensure that handrails extend continuously along the entire length of the ramp, with no interruptions, to provide consistent support for users.
- Handrail Height: If the ramp's rise is over 6 inches, install handrails that are 36 inches high on both sides of the ramp.
- Space Limitations: Be sure to consider the space limitations when planning out your ramp. If there are obstacles that prevent a single straight ramp, you may want to add a 90 degree turn, or even a switchback which essentially is a U-turn. This allows you to conserve space while still accommodating a long enough ramp for a higher threshold.
- Resting Landings: For single runs, create resting landings that are at least as wide as the ramp and extend 60 inches in length.
- Edge Protection: Install edge protection on both sides of the ramp to prevent wheelchair wheels from accidentally rolling off the edge.

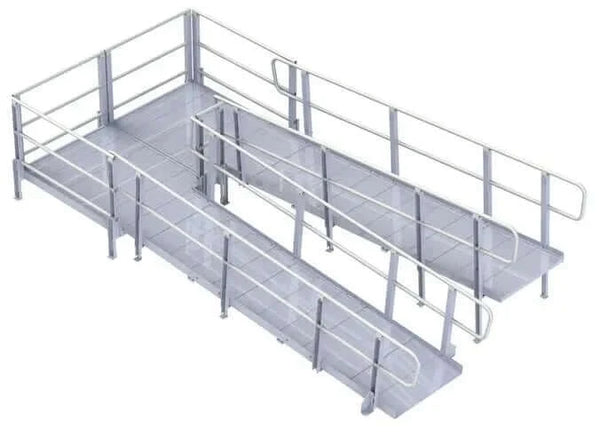
- Directional Changes: For ramps with changes in direction between runs, design landings with dimensions of at least 60 x 60 inches to accommodate wheelchair turns and provide a similar-sized entrance landing for door access.
- Surface Quality: Maintain a cross-slope of less than 1:48, ensuring the ramp surface is stable and slip-resistant.
- Smooth Transitions: At both the bottom and top of the ramp, incorporate smooth transitions to prevent wheelchair wheels from getting stuck during entry and exit.
- Clear Landings: Maintain clear landings at the top and bottom of the ramp to allow for safe and easy entry and exit from the ramp.
- Color Contrast: Use color contrast on the ramp's surface and handrails to enhance visibility for individuals with visual impairments, adhering to accessibility standards.
By keeping these considerations in mind, you can create a wheelchair ramp that is not only safe but also accessible to a wide range of users.
Planning & Preparation - Do I Need A Permit?
To ensure a safe, legal and compliant wheelchair ramp for your home, consider both the ramp's configuration and the materials you use. Start by checking with your local municipality to determine if you need a building permit. Most building codes require permits and inspections for ramps 30 inches or higher above the ground. Some locations mandate frost-proof footings for permanent ramps, while others allow treated plywood pads for temporary ones. Additionally, many homeowner associations require design and material approval. Ensure you meet all these requirements and obtain necessary permits well in advance.
Securing a building permit is crucial, and the regulations can vary widely between cities and states. Failure to secure a permit in areas where it's required can result in fines and legal issues. Research your city and county regulations online, or contact your local Public Works or building code office for guidance on permits and local ramp-building regulations. Always consult with an architect or licensed contractor before beginning your project to ensure it meets your specific needs. These steps will help streamline your ramp construction process while adhering to best practices.

Part 2: Step By Step Construction
Install Any Posts If Applicable
When beginning the construction of the ramp, it's crucial to start with proper footing excavation. Dig your footings deep enough to reach below the frost line, adhering to local building codes that specify the required depth, diameter, and shape of your footings. Some codes might necessitate wider bottoms or the inclusion of gravel for drainage. Always prioritize safety; don’t forget to dial 811 before you dig to identify and avoid any underground utilities.
For a permanent ramp structure, dig sturdy post holes to ensure stability. Opt for 4x4-inch posts, spaced six feet apart (max eight feet apart). Enhance structural integrity by cross-bracing each post in at least one position in each direction. Secure the stringers to the posts using 3.5-inch screws, employing 1/4-inch by 4-inch high shear strength screws at load joints and for attaching the sill to your home. If the stringers aren't at ground level, employ joist hangers, secured with 1 and 5/8-inch hanger nails. Utilize screws for all other fastenings to guarantee a solid and reliable ramp structure.

Pour The Concrete If Necessary
Now, it's time to move on to the concrete phase. Consider using a tubular concrete form for this step, although another option is to pour the concrete directly into the prepared holes.
Install the Joists If Your Ramp Requires It
When proceeding with your wheelchair ramp construction, it's important to ensure structural integrity. To achieve this, employ joist hangers and secure them in place using sturdy 16d nails. These joist hangers and nails play a pivotal role in enhancing the overall stability of your ramp.
For an extra layer of support and durability, strategically place cross braces at intervals of approximately every 4 feet along the ramp's length. These cross braces serve as additional reinforcements, promoting the longevity and steadfastness of your ramp structure.
Moreover, it's worth noting that if the length of any individual ramp run extends beyond 8 feet, it's advisable to consider further measures for support. In such cases, the inclusion of extra support posts or opting for larger dimensional wood may be necessary. This proactive approach ensures that your wheelchair ramp not only meets safety standards but also provides a reliable and lasting solution for accessibility. By carefully following these construction steps, you're well on your way to creating a sturdy and SEO-friendly wheelchair ramp tailored to your needs.
Install The Decking
When you've successfully completed the framing stage of your wheelchair ramp, it's time to move on to the crucial step of decking installation. To ensure the long-term stability and safety of your ramp, the choice of decking material plays a pivotal role. Opt for a decking material that can be securely screwed down to the joists, preventing any risk of boards lifting or becoming unstable over time.
Consider using a composite material for your decking, as this choice not only minimizes maintenance efforts but also significantly lowers the probability of needing to replace individual boards. It's a durable and practical solution for the long haul.
Additionally, when selecting your decking boards, pay careful attention to choosing a type that aligns with the specified joist spacing for your ramp's design. This thoughtful selection ensures a seamless and secure fit, preventing any structural issues down the line.
PLEASE NOTE: Building the ramp in long, continuous spans might seem convenient, but it can lead to challenges when adjustments are needed or if the initial design proves impractical. Instead, a more strategic approach involves constructing individual modules. These modules can later be bolted together at the vertical supports, offering flexibility and adaptability to your ramp's layout.
Furthermore, keep in mind that your wheelchair ramp may not be a permanent fixture. When the time comes to remove it or if it's no longer needed, these modular components can be conveniently disassembled and even sold to recoup your investment. This forward-thinking approach not only ensures the practicality of your ramp but also offers a sustainable way to handle its future use.

Install The Railings
In the construction of your wheelchair ramp, it's crucial to recognize the pivotal role played by the corner posts. These posts serve a dual purpose, acting as not only structural support for the ramp's surface but also as the foundation for the railing system. When it comes to railing construction, adherence to ADA (Americans with Disabilities Act) requirements is key. These comprehensive guidelines cover various aspects of railing design, including the overall railing height, hand-hold specifications, spindle placement, and other essential safety considerations. While not obligatory for residential projects, it is strongly recommended to follow these ADA guidelines to ensure the utmost safety and accessibility for your ramp users.
Moreover, it's worth noting that for optimal safety and stability, railing sections should not exceed 8 feet in length. If your ramp section extends beyond this limit, a strategic approach is to center the middle posts along the edges. To further bolster stability, attach an intermediary post to the outer joists using secure 1/2-inch-by-6-inch carriage bolts. This meticulous attention to detail ensures that your railing system not only complies with safety standards but also provides a reliable and user-friendly feature for your wheelchair ramp.

Finishing Touches - Lay Down Anti-Slip Surfaces
When it comes to enhancing the safety of your wheelchair ramp, one crucial step is to lay down an anti-slip surface. While some municipal codes may mandate an anti-slip running surface that spans the entire ramp's length, it's essential to recognize that even when not required by regulations, this precaution is highly recommended by building and safety experts. By doing so, you create a safer environment for ramp users, reducing the risk of accidents.
Now, let's explore the various options available for creating an effective anti-slip surface. The choice you make may depend on your personal preferences and the specific characteristics of your ramp. For wooden ramps, you can opt for commercial "grit" tape, strips of roofing or shingling, or apply a coating of polyurethane sprinkled with sand. These materials are readily available at most hardware or building supply stores, offering a range of choices to suit your needs.
For a more advanced, cement ramp, if you have a concrete ramp, achieving an anti-slip surface is achieved by a different method. While the concrete is still in the drying and hardening phase, you can use a broom to brush the surface. This action creates a rougher, less-smooth texture, significantly improving traction and safety.
By taking these measures to install an anti-slip surface on your wheelchair ramp, you not only meet safety standards but also prioritize the well-being of those who will use the ramp.

Build & Install The Landing
At the culmination of your ramp construction, it's essential to create a well-designed landing, offering both safety and functionality. This landing can be crafted from sturdy concrete or the same materials used for the rest of the ramp, ensuring a cohesive and visually appealing design.
In terms of dimensions, it's advisable to make the landing platform generously sized. At a minimum, it should match the width of the ramp itself, ensuring ample space for maneuverability. The length of the landing should extend a minimum of 60 inches, guaranteeing sufficient room for wheelchair users to comfortably transition from the ramp to the adjacent area.

Part 3: Maintenance & Accessibility
Routine Maintenance
To ensure the longevity and safety of your homemade wheelchair ramp, here are some essential maintenance tips to keep in mind:
- Regular Inspection: Conduct frequent visual inspections to identify any signs of wear, damage, or rot.
- Cleaning: Sweep or power wash the ramp periodically to remove dirt, debris, and moss or algae growth, which can make the surface slippery.
- Stain or Sealant: Apply a protective stain or sealant to the wood to prevent moisture penetration, rot, and UV damage. Reapply as needed, typically every 1-2 years.
- Repair Damage: Promptly repair or replace any damaged or rotting boards to maintain a safe surface.
- Tighten Fasteners: Regularly check and tighten screws, bolts, and nails to ensure the ramp remains secure.


- Anti-Slip Coatings: Make sure the anti-slip coating you initially applied to the ramp is still sufficient and there’s no sign of wear and tear.
- Clear Debris: Keep the area around the ramp clear of leaves, snow, and other debris to prevent water accumulation and deterioration.
- Handrail Maintenance: Inspect and maintain handrails, ensuring they are secure and free from splinters or loose components.
- Ramp Slope: Monitor the ramp's slope to ensure it remains within the recommended guidelines, preventing excessive steepness.
- Annual Checkup: Schedule an annual professional inspection to assess the ramp's structural integrity and overall condition.
By following these maintenance tips, you can prolong the life of your wheelchair ramp, ensuring it remains safe and accessible for years to come.
Ensuring Accessibility - Benefits of Annual Inspections
Regular inspections of homemade wheelchair ramps are of paramount importance to maintain accessibility and ensure the safety of users. Here's why these inspections are crucial:
- Safety Assurance: Homemade ramps, though well-intentioned, may not always meet the same quality and safety standards as professionally designed and built ramps. Regular inspections help identify potential hazards, such as loose boards, structural weaknesses, or uneven surfaces, which could lead to accidents and injuries.
- Preventive Maintenance: Inspections allow you to catch issues early, preventing small problems from escalating into major repairs. Fixing minor concerns promptly is more cost-effective and less disruptive than addressing larger structural issues that can compromise the ramp's functionality.
- Compliance with Regulations: For wheelchair ramps to be considered compliant with accessibility regulations, they must meet certain specifications, including slope, width, and handrail requirements. Regular inspections help ensure that the ramp continues to meet these standards and remains usable for individuals with disabilities.

- Weather and Seasonal Changes: Outdoor ramps are exposed to varying weather conditions throughout the year. Inspections help detect weather-related wear and tear, such as wood rot, rusting fasteners, or the buildup of ice and snow, which can impact the ramp's usability.
- Enhanced Longevity: Homemade ramps are often constructed with cost-effective materials, which may deteriorate faster than professional-grade materials. Regular inspections help identify signs of wear and tear, allowing for timely repairs and maintenance to extend the ramp's lifespan.
- Peace of Mind: Regular inspections provide peace of mind to users and caregivers, knowing that the ramp is in good condition and safe for daily use. This confidence is especially vital for individuals with mobility challenges who depend on the ramp for access.
Winter Maintenance
Winterizing wheelchair ramps is crucial to ensure they remain safe and accessible during snowy and icy conditions. Here's a guide to help you prepare and maintain your ramp:
Choose Slip-Resistant Materials:
- If you're building a new ramp, consider using slip-resistant materials for the ramp's surface, such as composite decking with anti-slip additives or stamped concrete.
- For existing wooden ramps, apply an anti-slip coating or grip tape to enhance traction.
Regular Maintenance:
- Inspect the ramp before winter to identify and repair any loose boards, nails, or screws.
- Ensure that handrails are secure and in good condition.
- Clear the area around the ramp to prevent snow accumulation and make it easier to access.

Shoveling and Snow Removal:
- After each snowfall, promptly shovel or snow-blow the ramp to remove snow and prevent ice buildup.
- Use a plastic snow shovel to avoid damaging the ramp's surface.
- Apply salt or ice melt sparingly to prevent damage to the ramp material. Avoid using rock salt, which can corrode metal components.
Create a Path:
- Create a clear path on the ramp and landing area to facilitate safe movement.
- Consider installing heated mats or cables on the ramp's surface to prevent ice buildup.
Handicap Railing Considerations:
- Ensure that handrails are clear of snow and ice to provide support for users.
- Consider wrapping handrails with foam pipe insulation to make them easier to grip in cold weather.
Regular Inspections:
- Periodically inspect the ramp throughout the winter for any ice patches or slippery areas. If necessary, apply more ice melt or sand for added traction.
Non-Slip Footwear:
- Users should wear appropriate non-slip footwear to reduce the risk of slipping.
Provide Assistance:
- If possible, offer assistance to individuals using the ramp during icy conditions to ensure their safety.
Keep Ramps Clear:
- Don't allow snow or ice to accumulate on the ramp for extended periods. Regular maintenance is essential to keep the ramp accessible.
Plan for Accessibility:
- In cases of severe weather, consider having an alternative accessible entrance or evacuation plan in place.

Let Us Know What You Think!
Your thoughts and questions are incredibly valuable to us, and we'd love to hear from you. If you have additional insights to share, your comments can spark meaningful discussions and enhance the collective knowledge of our community. Don't hesitate to ask any questions you may have; our team is here to provide answers and engage with you. So, please, take a moment to leave a comment or question below. Your input is much appreciated!
Conclusion
Understanding how to build a wheelchair ramp isn't just a matter of construction; it's about enhancing the overall quality of life for those who rely on it. By creating a safe, well-structured, and seamlessly integrated ramp, you're not only providing accessibility to your home but also improving the daily experiences of individuals with mobility challenges. This commitment to accessibility not only adds value to your property but also reflects your dedication to inclusivity and the well-being of your community.
Leave a comment